Introduction
Realtek hd audio manager download reinstall on windows : software for Windows operating systems. It plays a crucial role in managing and optimizing audio settings on computers, ensuring high-quality sound output. However, like any other software, it may encounter issues or get corrupted over time. In this article, we will explore the steps to download and reinstall Realtek HD Audio Manager on Windows, ensuring that you can enjoy an enhanced audio experience once again.
1. Understanding Realtek HD Audio Manager
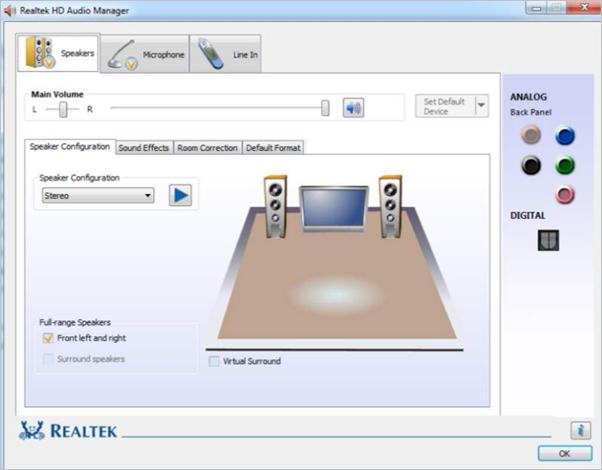
Realtek HD Audio Manager is a software application developed by Realtek Semiconductor Corp. It comes bundled with most motherboards that use Realtek audio chips. The main purpose of this tool is to provide users with control over their computer’s audio settings, allowing them to adjust volume, speaker configuration, microphone settings, and audio effects.
2. Common Issues with Realtek HD Audio Manager
Despite its reliability, Realtek HD Audio Manager can encounter some common issues. These include driver conflicts, outdated software, missing configurations, or even accidental deletions. When faced with audio-related problems, it’s often best to reinstall the software to restore proper functionality.
3. Preparing for Reinstallation
Before proceeding with the reinstallation process, it’s essential to prepare your system. Create a system restore point to safeguard your current settings, files, and drivers. You can do this by following these steps:
- Press the Windows + R keys to open the Run dialog.
- Type “sysdm.cpl” and hit Enter to open the System Properties window.
- Navigate to the System Protection tab and click on the Create button.
- Follow the on-screen instructions to create a restore point.
4. Downloading Realtek HD Audio Manager
To download the latest version of Realtek HD Audio Manager, follow these steps:
- Visit the official Realtek website or a trusted software repository.
- Locate the Downloads or Support section.
- Search for the appropriate audio driver for your Windows version.
- Download the driver to a location easily accessible on your computer.
5. Installing Realtek HD Audio Manager
Once the driver is downloaded, proceed with the installation:
- Navigate to the location where you saved the downloaded file.
- Double-click on the installer to start the installation process.
- Follow the on-screen instructions to install Realtek HD Audio Manager on your system.
6. Configuring Audio Settings
After installation, you can access Realtek HD Audio Manager from the system tray or the Control Panel. Use the interface to configure audio settings according to your preferences.
7. Troubleshooting Audio Problems
In case you encounter audio issues after the reinstallation, try the following steps to troubleshoot:
- Ensure all cables and connections are secure.
- Check for updated drivers from the official website or Windows Update.
- Run the built-in Windows audio troubleshooter.
8. Updating Realtek HD Audio Manager
Realtek regularly releases updates to improve performance and fix bugs. To update the software:
- Visit the official Realtek website.
- Download the latest version of the driver.
- Follow the same installation process as before.
9. Uninstalling Realtek HD Audio Manager
If you decide to uninstall Realtek HD Audio Manager, follow these steps:
- Open the Control Panel on your computer.
- Click on Programs or Programs and Features.
- Locate Realtek HD Audio Manager in the list of installed programs.
- Right-click and select Uninstall.
10. Reinstalling Realtek HD Audio Manager
To reinstall the software, repeat the steps mentioned in sections 4 and 5 of this article.
11. Advanced Audio Configurations
Realtek HD Audio Manager offers advanced configurations for audiophiles and professionals. These settings allow you to fine-tune the audio output to suit your specific needs.
12. Enhancing Audio Quality
Explore the various audio effects and enhancements available in Realtek HD Audio Manager to optimize your listening experience.
13. Tips for Better Audio Performance
Here are some additional tips to enhance your overall audio performance:
- Keep audio drivers up to date.
- Use high-quality audio cables and accessories.
- Optimize speaker and microphone placements.
14. Frequently Asked Questions (FAQs)
Q1: Is Realtek HD Audio Manager compatible with all versions of Windows?
A: Realtek HD Audio Manager is compatible with most Windows operating systems, including Windows 7, 8, 8.1, and 10.
Q2: Can I reinstall Realtek HD Audio Manager without losing my audio settings?
A: Yes, reinstalling Realtek HD Audio Manager should retain your previous audio settings.
Q3: Can I download Realtek HD Audio Manager for Mac?
A: No, Realtek HD Audio Manager is designed for Windows-based systems and is not available for macOS.
Q4: How do I update Realtek HD Audio Manager automatically?
A: You can use third-party software or let Windows automatically search for updates through Device Manager.
Q5: Does Realtek HD Audio Manager support surround sound configurations?
A: Yes, Realtek HD Audio Manager supports various speaker configurations, including surround sound setups.
Conclusion
Realtek HD Audio Manager is an essential tool for managing audio settings on Windows computers. By following the steps provided in this article, you can easily download and reinstall the software to ensure optimum audio performance. Remember always to keep your drivers up to date and explore the advanced configurations for a personalized audio experience.

